




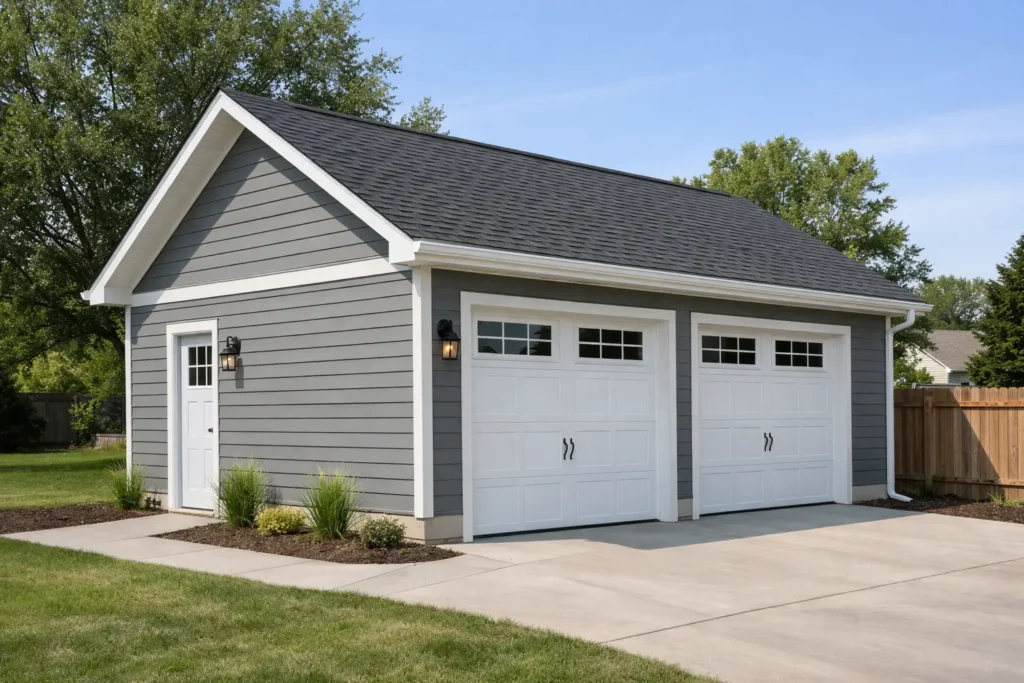
A detached garage build example is most useful when it shows the decisions behind the structure, not just a finished building with fresh siding and new doors. For many Southwestern Pennsylvania property owners, the goal is straightforward: protect vehicles and equipment, gain dependable storage, and build something that holds up through snow, rain, wind, and daily use.
Consider a common project: a 24-by-32-foot detached two-car garage with one service door, two overhead doors, a concrete floor, attic storage, and enough electrical capacity for lighting, outlets, and a future workshop. It is large enough to be genuinely useful without taking over a typical residential lot. The final design can change based on setbacks, driveway access, soil conditions, and how the owner expects to use the space five or ten years from now.
Detached Garage Build Example: Start With the Job It Must Do
A 24-by-32 garage provides 768 square feet. On paper, that sounds generous. In practice, it can fill quickly. Two full-size vehicles, lawn equipment, shelving, bicycles, tools, and a workbench need room to coexist without turning parking into a daily shuffle.
In this example, the owner wants two vehicles inside year-round, plus a compact tractor and seasonal equipment. Rather than choosing a narrower building with a deeper layout, the 24-foot width gives better door spacing and room to open vehicle doors. The 32-foot depth leaves space behind parked vehicles for storage and a workbench.
That is the first trade-off to settle. A garage built only around today’s vehicles may feel cramped as soon as storage needs grow. On the other hand, adding square footage increases excavation, concrete, framing, roofing, siding, labor, and permit-related costs. The right size is usually the smallest footprint that comfortably handles the intended use with some room for change.
A practical layout for this project
The two overhead doors are placed on the 24-foot front wall. For most homeowners, two individual doors are more practical than one oversized door because each bay can be used independently and the garage door system has less moving weight per opening. A service door sits on the side closest to the home, making it easier to enter without lifting a garage door.
Inside, a 3-foot-wide walkway is kept along one wall. Deep shelves are placed at the rear, while a workbench is located near windows and electrical outlets. This arrangement keeps the vehicle bays clear and makes the garage easier to use in winter when muddy boots, wet equipment, and snow-covered vehicles come through the doors.
Site Preparation Comes Before the Building
A well-built garage starts below grade. The selected site needs enough room for the building, roof overhangs, access around the exterior, driveway approach, drainage, and required setbacks. A location that looks open from the house can still create trouble if the grade pushes water toward the foundation or if a delivery truck cannot safely reach the pad.
For this detached garage build example, the site slopes slightly away from the house. That is helpful, but it does not eliminate the need for careful grading. The pad should be prepared so surface water moves away from the slab and does not collect near walls, doors, or the driveway apron. In areas with clay soils, variable grades, or heavy runoff, drainage planning deserves extra attention.
The project uses a properly prepared stone base beneath a reinforced concrete slab. Foundation depth and construction details should follow local code requirements and site conditions. Frost is a real consideration across this region, so it is not a place to guess or cut corners. A garage floor that settles, cracks excessively, or holds water becomes a costly problem long after the walls are up.
Before breaking ground, confirm property lines, utility locations, zoning requirements, setback rules, and permit needs with the appropriate local authorities. A detached garage may also be subject to limits on height, lot coverage, or accessory-building placement. These details vary by municipality, which is why local guidance is more valuable than a one-size-fits-all plan found online.
Choose Doors Around Vehicles, Not Just Openings
The example garage uses two 9-by-8-foot overhead doors. That size works well for many pickup trucks, SUVs, and standard equipment, provided the building layout has sufficient clearance. Owners with tall trucks, roof racks, trailers, tractors, or enclosed equipment may need 10-foot-wide or taller doors.
Door width and height affect more than convenience. They also affect the framing plan, headroom, track configuration, opener selection, and the amount of wall space left for storage or windows. It is far less expensive to choose the right opening before construction than to enlarge it after the building is finished.
Insulated garage doors are worth considering when the garage will be heated, used as a workshop, or attached to a routine work area. Even in an unheated building, insulation can reduce temperature swings and help control condensation. The best choice depends on how the garage will be used, not simply on the highest available insulation rating.
Reliable installation matters just as much as the door itself. A properly sized spring system, correctly aligned tracks, weather seals, and safe opener setup help the door operate smoothly through changing seasons. Tri County Door & Builders can help property owners match door size, construction, and installation needs to the building plan rather than treating the door as an afterthought.
Roofing, Siding, and Weather Protection
This example uses a gable roof with adequate overhangs, gutters, and downspouts directed away from the slab. A simple roofline is usually the most economical option, easier to frame, and easier to maintain. The roof pitch should account for local weather, the desired interior ceiling height, attic-storage plans, and the appearance of nearby structures.
For a shingle roof, quality underlayment, flashing, ventilation, and correct installation are as important as the shingles themselves. Water typically finds its way in at transitions and penetrations, not across the middle of a properly installed roofing field. Homeowners comparing roofing materials should consider service life, appearance, maintenance, and the roof’s ability to perform through Pennsylvania weather.
Siding selection follows a similar rule: choose for the building’s job. Metal siding is durable, low-maintenance, and a natural fit for many garages, workshops, and agricultural-style structures. Vinyl and engineered wood products can also work well when matching the home is a priority. The best material is the one that fits the budget, maintenance expectations, and surrounding property.
Plan Utilities Before the Concrete Is Poured
The owner in this example plans to use the garage for basic vehicle maintenance and weekend projects. That means more than one ceiling light and a single outlet. Electrical planning includes bright LED lighting, wall outlets along the workbench, exterior lighting near the service door, dedicated circuits for tools, and a circuit sized for a future heater or compressor.
Conduit placed before the slab is poured can make future electrical or water connections much easier. If a sink, floor drain, bathroom, or heat source may be added later, discuss those possibilities before the foundation work begins. Not every garage needs those features, but planning for them early can prevent expensive demolition later.
Insulation is another use-based decision. An unheated garage that stores vehicles may only need air sealing and basic protection. A workshop used through the winter benefits from insulated walls, an insulated ceiling, insulated doors, and a heating plan sized for the space. Good insulation without air sealing leaves gaps in the system, while heating an uninsulated garage can become an ongoing expense.
Budget for the Whole Project, Not Just the Shell
The visible building package is only part of the cost. Site work, excavation, stone, concrete, drainage, electrical service, permits, door installation, gutters, driveway work, insulation, and interior finishes can shift the final number significantly. A level site with easy access may cost far less to prepare than a sloped, wet, or tight-access location.
The practical approach is to separate must-haves from future upgrades. In this example, the owner prioritizes a sound slab, properly sized doors, weather-tight roofing, good lighting, and electrical capacity. Interior wall finishes, heat, cabinets, and a more elaborate workshop setup can come later. That protects the core structure without forcing every possible upgrade into the initial budget.
A detached garage should make the property easier to use from the day it is built. Start with a layout that fits your vehicles and equipment, prepare the site correctly, and choose materials and doors that match the way you actually live and work. A clear plan now gives you a building that will keep earning its space for years.