




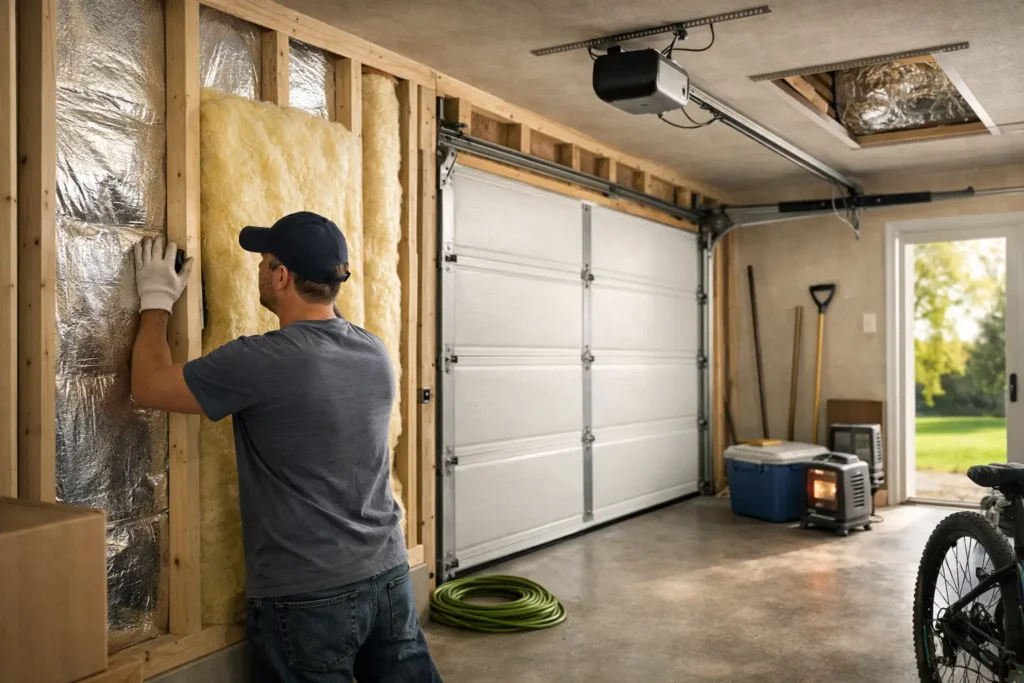
A garage that feels like an icebox in January and a heat trap in July is not just uncomfortable. It can make adjacent rooms harder to heat, put stored tools and equipment through harsh temperature swings, and turn a usable workspace into wasted square footage. Well-planned garage insulation upgrades address those problems by controlling heat loss, limiting drafts, and matching materials to how the garage is actually used.
For many property owners, the right answer is not simply filling every open cavity with insulation. Garages have different needs than finished living spaces. A detached workshop, an attached two-car garage, a farm outbuilding, and a commercial service bay each call for a different approach. The goal is to spend where performance matters most and avoid trapping moisture or interfering with door operation, wiring, ventilation, or storage plans.
Start With How You Use the Garage
Before choosing insulation, decide what the space needs to do. A garage used only for vehicle storage may need air sealing and a better-insulated garage door more than a fully insulated interior. A workshop where someone spends evenings repairing equipment or building furniture needs more consistent temperatures, especially around the ceiling and exterior walls.
Attached garages deserve special attention because they share a wall, ceiling, or both with conditioned areas of the home. Heat can move through those surfaces, but so can fumes and moisture. Insulating and air sealing the boundary between the garage and home can improve comfort in nearby bedrooms, kitchens, or bonus rooms while helping keep garage air out of the house.
For a detached garage, pole building, or agricultural structure, insulation decisions often depend on whether heat will be added now or later. If the building may eventually become a workshop, hobby space, or business area, it is usually smarter to plan insulation, vapor control, and interior finishes during construction instead of opening finished walls later.
The Best Places to Focus Garage Insulation Upgrades
Not every part of the building has the same effect on comfort. In Southwestern Pennsylvania, heat rises, and cold outdoor air finds every available gap. That makes the ceiling, exterior walls, garage door, and air leaks the main priorities.
Insulate the ceiling or roofline first
If there is a room above the garage, insulating the garage ceiling is often the highest-value improvement. It protects the floor of the room above from cold air below. In an unfinished ceiling, fiberglass batts can be a practical option when installed correctly around wiring, lighting, and access points. Blown insulation may make more sense above a finished ceiling or in attic areas where coverage needs to be even and complete.
For garages with open rafters, the decision is more nuanced. Insulating at the roofline can create a more temperate interior, but it must be coordinated with roof ventilation and the type of roof assembly. Blocking ventilation paths or placing the wrong materials against the roof deck can create moisture problems that are far more expensive than a chilly garage.
Upgrade exterior walls where access is easy
Open stud walls are the simplest and most cost-effective place to add insulation. Fiberglass batts are widely used, affordable, and suitable for standard wall cavities when fitted carefully. Gaps, compression, and missing sections reduce performance, so installation quality matters as much as the labeled R-value.
Rigid foam boards can be useful where space is limited or where a continuous insulating layer is needed to reduce thermal bridging through framing. Spray foam can also perform well in irregular cavities and around penetrations, but it costs more and should be installed by qualified professionals. The best choice depends on the wall design, budget, and whether the wall will be covered with drywall, steel liner panels, plywood, or another finish.
Do not overlook the garage door
A large overhead door is often the weakest thermal surface in the entire garage. An uninsulated steel door can make the building feel colder even when walls and ceilings are insulated. Replacing it with an insulated garage door can improve comfort, reduce outside noise, and help stabilize temperatures near the door.
Door insulation kits are available, but they are not always the best answer. Added weight can affect spring balance and opener performance, and thin panels may provide limited benefit. A properly built insulated door with intact weather seals generally delivers better results and avoids putting extra strain on a door system. If a door is already difficult to operate, repair or adjustment should come before adding anything to it.
Seal air leaks before expecting insulation to perform
Insulation slows heat transfer. It does not stop cold air from moving through cracks around the door, sill plate, windows, service doors, vents, and utility penetrations. Weatherstripping on side doors, a bottom seal on the garage door, and quality perimeter seals can make an immediate difference.
Pay close attention to the area where the garage connects to the home. Seal obvious gaps around pipes, wiring, and ductwork with materials appropriate for the location and fire-safety requirements. A garage should not be sealed so tightly that required ventilation is compromised, but uncontrolled drafts are never a benefit.
Choose the Right R-Value for the Assembly
Higher R-values generally slow heat flow more effectively, but the highest number is not automatically the best investment. The right target depends on the existing construction, whether the garage is heated, and whether insulation is being added to walls, ceilings, or a roof assembly.
A heated garage or year-round workshop deserves more insulation than a space used only for parking. Ceiling insulation is often worth prioritizing because it has a large impact on heat loss. Wall insulation can be especially valuable when a garage has long exterior walls exposed to winter wind or summer sun. Door R-values should be viewed alongside weather seals, construction quality, and how frequently the door opens.
It also helps to think beyond the insulation package. Steel framing, concrete foundations, uninsulated slab edges, and exposed structural members can carry heat around insulated cavities. This is why a garage can still feel cold after insulation is installed. The work may be correct, but thermal bridging and air leakage may still be doing their part.
Moisture Control Is Part of the Job
Garages see wet vehicles, snow-covered boots, humidity, fuel odors, and temperature swings. That combination makes moisture management essential. Materials should be selected and installed with the local climate and wall design in mind, particularly when adding a vapor retarder or spray foam.
A vapor retarder in the wrong location can trap moisture inside a wall or ceiling assembly. Ventilation details matter, too. For example, a roof system designed to vent at the eaves and ridge needs a clear path for airflow. When in doubt, have the full assembly reviewed rather than choosing materials based on a single product label.
The concrete slab is another common source of discomfort. Insulating an existing slab is usually more involved than insulating walls or ceilings, but area rugs, insulated floor mats, and a planned work zone can make a workshop more comfortable without major demolition. For new construction, insulating under and around the slab is easier to address before concrete is poured.
DIY Work vs. Professional Installation
A capable DIY property owner can often install weatherstripping, replace worn door seals, add batt insulation to accessible wall cavities, or insulate a simple detached garage. The key is taking time to fit materials correctly and keeping insulation clear of heat-producing fixtures, electrical hazards, and ventilation channels.
Professional help is usually the better choice when the project involves spray foam, dense-pack insulation, a finished ceiling, roofline insulation, structural repairs, electrical relocation, or an overhead door that needs service. A contractor can also identify details that are easy to miss, such as inadequate attic ventilation, damaged sheathing, rodent entry points, or a garage door that is no longer properly balanced.
For homeowners and property owners in Westmoreland, Somerset, and Fayette counties, Tri County Door & Builders can help evaluate practical insulation and garage-door improvements without treating every garage like the same project. That local perspective matters when winter weather, building age, and the intended use of the space all affect the best solution.
Plan the Work in the Right Order
The most efficient projects follow a sensible sequence. First, correct water intrusion, roof leaks, damaged siding, or door problems. Next, seal obvious air leaks and address ventilation requirements. Then install insulation in ceilings and walls while access is open. Finish with interior coverings, storage systems, or heating equipment once the building envelope is improved.
Avoid installing a heater first and hoping it solves the problem. A heater can warm the air, but it cannot fix a cold ceiling, a drafty service door, or an uninsulated overhead door. Once insulation and air sealing are in place, any heating system can usually work more effectively and with less wasted energy.
A better garage does not have to become a finished living room. Even modest improvements can make it easier to start the truck, protect valuable equipment, use a workbench in cold weather, and keep nearby rooms more comfortable. Start with the surfaces and gaps that are costing you the most, then build toward the garage you will be glad to use all year.